You will learn
how to add contacts and coils in the body of the programming window
how to create a variable
- Choose between programming with tool bar icons or using intelligent keysUsing toolbar icons
- Click on the required contact
 and coil
  in the toolbar or choose the item from the context menu
 - Place them into network 1 of the programming windowIf you place the elements in one grid line (same height in the network) then connection lines are drawn automatically.
Using intelligent keys- Place the cursor into network 1 of POU body
- Press the intelligent keys <2> for contact or <3> for coilIf contact and coil are placed in one grid line, then the connection lines will be drawn automatically. If connection lines are not drawn automatically, activate the option Insert new elements without lines (does not apply when using intelligent keys) under Extras > Options > Program options > Editors > LD/FBD editor.
- Click on the required contact
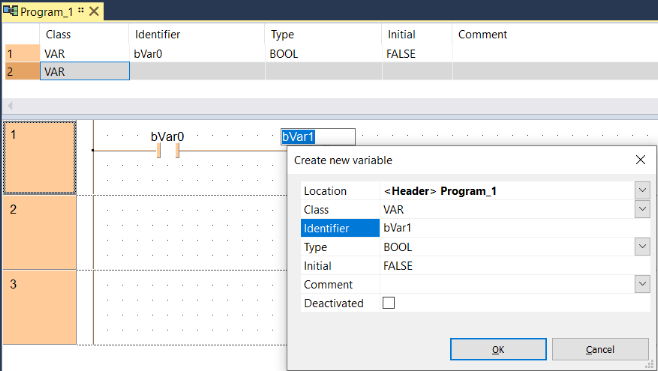
- Enter variable nameIf the variable name you enter has not been assigned yet, the Create new variable dialog opens. If no name is entered and you select a different element, a question mark will appear in the name box.NOTE
We recommend to use variables instead of explicit user addresses.
If you want to use explicit user addresses, please define them in the list of global variables.
The compiler can output a warning when using explicit user addresses in the POU declaration, see Extras > Options > Compile options > Additional warnings.
The Create new variable dialog opens

- Enter an identifier for the variable, e.g. bVar0
According to the prefix of variable identifiers, Control FPWIN Pro7 selects the data type BOOL.
- OK
- Create the variable bVar1 for the coil
If connection lines are not drawn automatically:
- Select the Draw line icon
 in the toolbar or from the context menu
 - Draw the connections between the contact and the coil
Each line has to be connected to the power rail. Be careful not to draw double lines or allow them to overlap.
Related topics: